

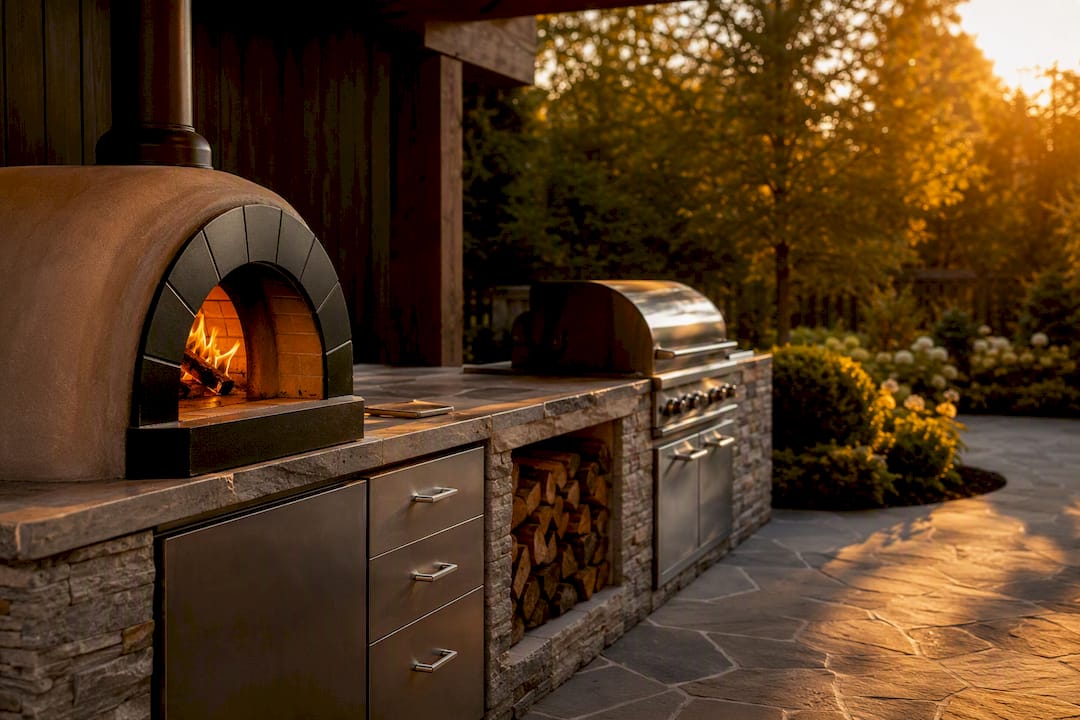
A pizza oven integrates successfully into an outdoor kitchen when you get three things right: placement that respects clearances and smoke direction, firebrick or refractory materials that survive thermal cycling, and ventilation that satisfies your local planning authority. Check whether you sit in a smoke control area before you choose fuel type. For a fully coordinated build, a design-led supplier such as Roostr can handle the layout, finish and installation as one package.
TL;DR:
- Use firebrick or refractory brick for the dome and hearth, and avoid concrete blocks due to thermal cracking risks.
- Confirm your smoke control area status and chimney clearance guidelines before purchasing or installing a wood-fired oven.
- Plan utility routes, such as gas, electrical, and water lines, during the initial construction phase to avoid costly retrofitting.
- Choose an oven placement that directs smoke away from seating areas and aligns with the work triangle for efficient workflow.
- Select a modular, pre-designed outdoor kitchen from a supplier like Roostr to ensure coordinated integration and proper service access.
Table of Contents
- What is pizza oven integration, and where should the oven sit?
- Which materials actually belong in an integrated oven?
- What fuel, flue and safety rules apply to a UK build?
- How do you plan the layout so the oven fits your workflow?
- Which oven types and accessories need space in the plan?
- How much maintenance does an integrated oven actually need?
- What do real Roostr installations show about integration?
- What electrical work does a gas or electric oven need?
- Do building codes affect more than just planning permission?
- When is a wood-fired dome worth the extra effort?
- How Roostr brings your pizza oven integration together
- Sources
What is pizza oven integration, and where should the oven sit?
Pizza oven integration means designing the oven’s position, structure and services as part of the outdoor kitchen from day one, rather than bolting a standalone unit onto a finished patio. Get the location wrong and you will spend years working around smoke drift, awkward door access or a plume that blows straight into the seating area.
Start with clearances. Most manufacturers and installers recommend keeping the oven a safe distance from combustible walls and cladding, with more distance if the façade is timber. Boundary proximity matters too, since a structure built close to a neighbour’s fence line is more likely to trigger a planning conversation, particularly if it is tall, permanent or brick-built. The Planning Portal treats outdoor kitchens as a form of outbuilding, and permitted development limits on height, coverage and proximity to your boundary decide whether you need to apply.
Three mounting approaches dominate real installs:
- Open placement on a paved area with no overhead cover, which suits a wood-fired dome that needs unrestricted heat dispersal but leaves cooks exposed to weather.
- Semi-enclosed under a canopy or pergola, popular because it protects guests from rain, though it demands careful chimney height and clearance planning to stop soot staining the structure above.
- Fully integrated in-wall mounting, where the oven sits within a run of cabinetry alongside a grill or sink, giving the cleanest look but requiring the most upfront planning for flue routing and service access.
Door orientation deserves more thought than most people give it. Face the opening away from prevailing wind and toward your prep counter, not toward guest seating, so smoke and radiant heat travel away from conversation rather than into it. Larger chamber openings also change what the oven can do: a deep, wide chamber supports roasting and multi-course cooking in one session, while a narrow countertop opening tends to stay pizza-only.
Before committing to a build, walk the site and check: prevailing wind direction, distance to the nearest window or door, boundary distance, access for a flue sweep in years to come, and whether the base will need levelling or a new slab.
Which materials actually belong in an integrated oven?
Firebrick or kiln-fired refractory brick is the only sensible choice for the dome and hearth. Ordinary clay brick can survive occasional light use, but it is prone to spalling once temperatures climb past around 650°C, and repeated firing eventually cracks the surface. Concrete blocks are worse: they were never designed for thermal cycling, and using them in the dome or hearth risks cracking or, in extreme cases, the block failing outright under heat.
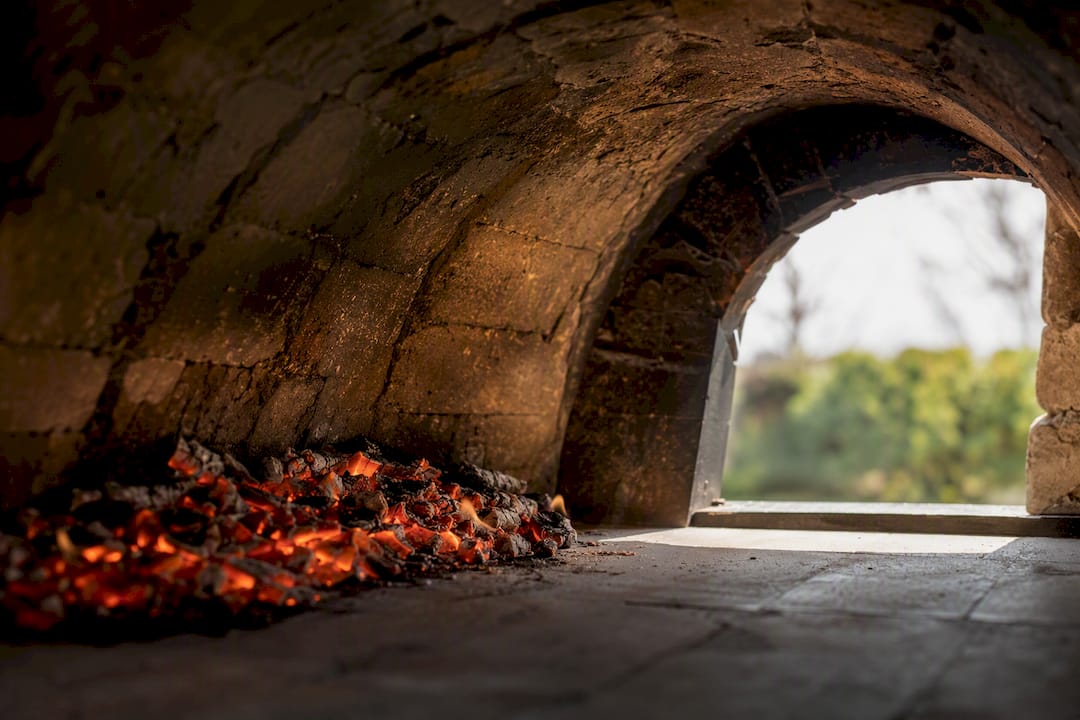
The base matters as much as the dome. A reinforced concrete slab gives a stable, long-term foundation for a masonry oven, but it needs an insulation layer between the slab and the hearth floor, otherwise heat bleeds downward and firing takes longer every single time. An elevated plinth achieves the same insulating effect while raising the cooking surface to a comfortable working height, which also happens to solve the “bending over a low oven for two hours” problem nobody warns you about.
For the façade, stainless steel, tile and natural stone all integrate cleanly with modular cabinetry, provided the cladding leaves the flue and any ventilation gaps unobstructed. Never let a decorative wrap seal off an air gap that the oven’s insulation relies on.
- Use firebrick or refractory brick for the dome and hearth, never concrete.
- Insulate between slab and hearth floor with a dedicated insulation board or loose-fill layer.
- Keep façade cladding clear of vents and flue penetrations.
- Specify refractory mortar rather than standard building mortar for all high-heat joints.
Pro Tip: Ask your installer for the insulation thickness in millimetres, not just the material name. A vague “insulated base” spec can mean anything from 25mm of board to a proper 50mm layer, and that difference shows up in your firing time and your fuel bill within the first month.
What fuel, flue and safety rules apply to a UK build?
Wood and gas solve different problems, and it is worth being honest about the trade-off rather than pretending one is objectively better. Wood-fired ovens produce genuine char and smoke flavour and reach very high dome temperatures, but they generate more smoke and need more attention to draw and airflow. Gas ovens light instantly, hold a set temperature with far less fuss, and produce a cleaner burn, at the cost of some of that wood-smoke character purists chase. Multi-fuel ovens split the difference, running on gas for weekday convenience and switching to wood for weekend showpieces.
If you live in a smoke control area, your wood-burning appliance must be DEFRA-certified as smoke-exempt before you buy it. Fitting an uncertified appliance in one of these zones is unlawful, and enforcement can mean fines or a requirement to remove the installation entirely, so check your postcode against your council’s smoke control map before you order anything.
Flue design is not optional detailing, it is the difference between an oven that draws properly and one that smokes out the terrace every time you light it. Chimney height needs to clear nearby structures so the plume disperses rather than pooling at head height, terminal position should sit away from windows and doors, and you need to leave physical access for a sweep, because a flue that cannot be cleaned will eventually choke.
- Confirm smoke control area status with your local council before choosing a wood-burning oven.
- Check chimney height, terminal clearance and boundary distance against your local authority’s guidance.
- Leave physical access for flue sweeping and future relining.
- If the oven serves paying customers rather than family and friends, expect additional licensing and fire-safety obligations on top of standard domestic rules.
Most domestic ovens fall under permitted development, but a tall permanent structure, one close to a boundary, or anything on a listed building or in a conservation area, can tip you into needing formal permission. When in doubt, a five-minute call to your local planning authority costs nothing and saves the far more expensive alternative of building something you later have to dismantle.
How do you plan the layout so the oven fits your workflow?
Treat the oven as one point of a working triangle, with a prep counter on one side and a plating or holding surface on the other. The goal is to move a raw pizza from counter to oven to plate without crossing your own path, which sounds obvious until you have carried a hot peel through a doorway someone else is standing in.
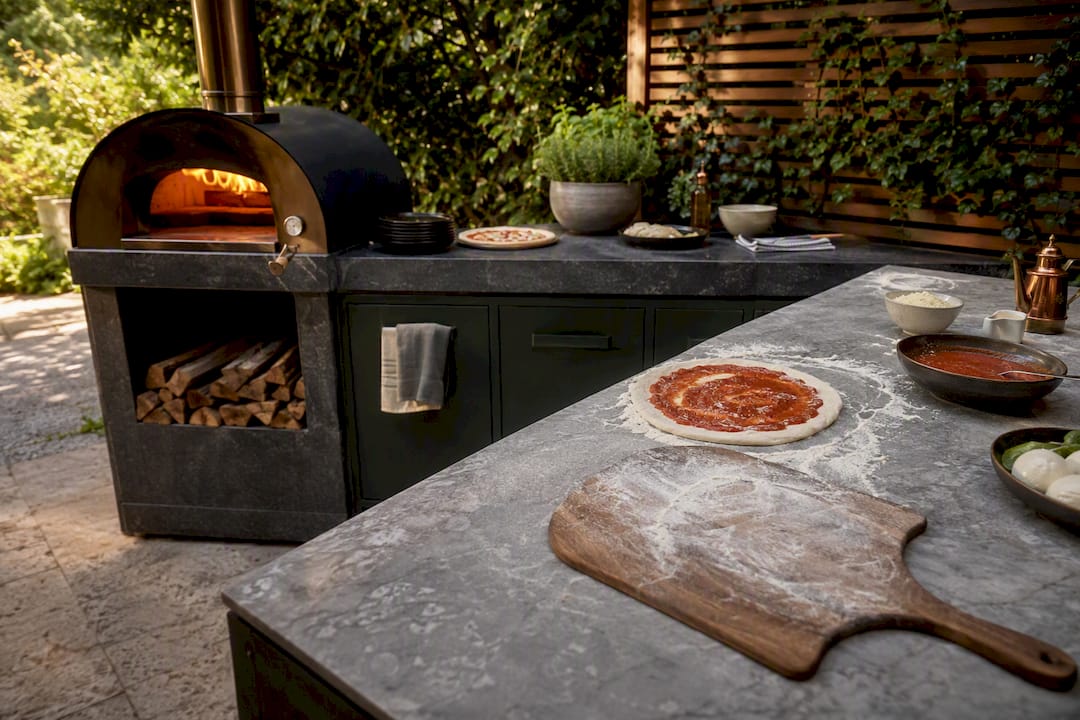
Four adjacencies make or break daily use: a prep counter within arm’s reach of the oven mouth, dedicated peel and tool storage that does not force you to hunt through a drawer mid-service, sink access nearby for hand washing and quick clean-up, and refrigeration or a cold box close enough that fetching toppings does not mean abandoning a pizza halfway through cooking.
For service flow, work through it in order:
- Prep all toppings and dough before lighting the oven, so the fire has time to reach temperature while you work.
- Stage finished pizzas near the oven mouth on a heatproof surface, not on the serving table itself.
- For small gatherings, cook one pizza at a time and serve as each comes out.
- For larger events, prep several bases in advance and stagger cooking in short bursts, using the oven’s residual heat for traybakes or roasted vegetables once the pizza rush finishes.
- Keep a designated “hot zone” clear of foot traffic so guests do not wander behind the cook.
Route gas, electric and water lines during the base-build stage, not after cabinetry goes in. A checklist worth following: confirm gas pipe routing avoids high-heat zones, position electrical sockets away from splash areas, and leave a water point within hose-reach of the cooking station. Roostr’s guidance on outdoor kitchen dimensions covers counter heights and reach distances that make this kind of planning far easier to get right first time.
Which oven types and accessories need space in the plan?
Freestanding ovens sit apart from your cabinetry and offer the most flexibility if you are still deciding on final layout. Countertop ovens drop into an existing modular run and suit smaller gardens, though most are pizza-focused rather than genuinely multi-purpose. Built-in and in-wall ovens integrate into cabinetry permanently, delivering the cleanest look but demanding the flue, clearance and service planning be finalised before installation.
Whatever type you choose, budget real space for the chimney, any protective cover, and ventilation accessories, since these get overlooked in early sketches and then fought over once building starts.
Kamado-style grills deserve a mention here, because they are frequently paired alongside a pizza oven rather than instead of it. A Big Green Egg, for example, handles low-and-slow smoking and searing that a dome oven is not built for, and slots into a modular run with its own clearance and ash-management needs, distinct from the oven’s. Plan the layout so both appliances get independent service access rather than sharing one tight gap.
- Leave 10 to 15% extra footprint if you might upgrade to a larger oven later.
- Plan flue access before finalising cabinetry, not after.
- Give any kamado-style unit its own clearance zone rather than squeezing it beside the oven.
- Budget for a weatherproof cover on every appliance left outdoors year round.
How much maintenance does an integrated oven actually need?
Routine care is light: clear ash after each use, check door seals for gaps that let heat escape, and wipe down the façade before grime bakes on. Seasonal jobs matter more. Book a flue sweep at least once a year, inspect the dome and hearth for spalling or hairline cracks, and reapply insulating render or surface seal where the finish has worn thin.
Cover the oven through winter and avoid letting moisture sit in the flue or chamber, since damp masonry that then gets fired hard is a common cause of cracking. If you spot deep cracking, a leaning chimney, or persistent smoke leakage around the dome, call a specialist for relining or structural repair rather than patching it yourself.
- Clear ash and check seals after every session.
- Book an annual flue sweep and dome inspection.
- Cover the oven and keep the chamber dry over winter.
- Call a specialist immediately for deep cracks, chimney movement or smoke leaks around the dome.
Pro Tip: Photograph the dome interior once a year from the same angle. Hairline cracks are far easier to spot as changes between two photos than from memory alone.
What do real Roostr installations show about integration?
The Rubix outdoor kitchen project shows how a gas barbecue can sit alongside dedicated cooking zones in a single stainless steel run, with service access kept clear on both sides so nobody has to reach across a hot surface mid-service. The layout prioritises a straight line between prep counter and cooking station, exactly the kind of work triangle a pizza oven benefits from too.
The Big Green Egg combination project tackles a different problem: fitting a kamado grill into a modular galvanised steel frame without compromising ventilation or airflow around the ceramic shell. The finish uses weather-resistant cladding that leaves the Egg’s own vents completely unobstructed, which is the detail that gets missed when people assume any enclosure will do.
Both projects lean on the same principle: modular stainless and galvanised steel units solve the recurring integration headache of fitting a high-heat appliance into cabinetry without trapping heat where it should not be. Readers weighing up their own layout can browse the project pages for specifications and photos before sketching their own.
What electrical work does a gas or electric oven need?
A gas oven typically needs a certified gas engineer for the pipe run and connection, plus, in many builds, a small electrical supply for an ignition system, internal light or temperature display. That electrical element still needs weatherproof outdoor-rated sockets and cabling, run by a qualified electrician, because standard indoor fittings are not rated for exposure to rain or damp.
Electric pizza ovens remove the gas connection question entirely but pull a heavier electrical load, often needing a dedicated circuit rather than sharing a socket with other outdoor kitchen appliances. Check the oven’s rated wattage against your consumer unit’s capacity before you commit, since underestimating this is one of the most common last-minute snags in outdoor kitchen builds.
Whichever fuel you choose, route cabling and gas pipework through the base structure during construction, not afterwards. Retrofitting a gas line or a new circuit into a finished modular run usually means pulling cabinetry apart, which costs far more in time and money than planning the route on paper first. If your build includes a sink or ice-maker near the oven, make sure any electrical points sit clear of splash zones and are RCD-protected, in line with standard outdoor electrical safety practice.
Get a gas safe registered engineer and a qualified electrician involved at the design stage rather than after the slab is poured. Both trades can flag routing conflicts, such as a gas pipe crossing under a proposed electrical trench, while changes are still cheap to make.
Do building codes affect more than just planning permission?
Planning permission gets most of the attention, but building regulations often apply independently of whether you needed planning consent at all. A structure can sail through as permitted development and still need to meet building regulations for structural stability, fire safety and ventilation, particularly once a chimney or flue is involved.
Local authorities also apply their own interpretation of national guidance, so a detail that passed without comment on a neighbour’s build might get flagged on yours, depending on soil conditions, drainage, or proximity to a shared boundary wall. This is where many self-builders come unstuck: they assume “no planning permission needed” means “no rules apply,” when in fact building control can still require sign-off on the foundation, structural fixings and flue installation.
If your outdoor kitchen sits near a shared boundary, check whether party wall rules apply, since works close to or on a boundary line can trigger separate notice requirements distinct from planning consent. Drainage is another area worth checking early, particularly if your build includes a sink, since surface water and wastewater routing sometimes needs its own approval depending on your local authority’s requirements.
The practical takeaway: treat your local planning authority and building control department as two separate conversations, not one. A quick call to both before you dig foundations costs you an afternoon. Discovering a problem after the render has gone on costs considerably more.
When is a wood-fired dome worth the extra effort?
A proper wood-fired dome earns its place when you cook often enough to justify the extra care, and when the flavour genuinely matters to how you entertain. If pizza night is a monthly event rather than a weekly habit, gas or a hybrid oven makes more sense: less fuss, faster to temperature, and none of the smoke-control paperwork wood demands.
Spending properly on firebrick, correct insulation and a professional install pays for itself over years, not months, in fewer cracks, less relining and a flue that draws the way it should. Whatever you choose, check your smoke control status and planning position before you order the oven, not after.
— Liam
How Roostr brings your pizza oven integration together
Roostr designs bespoke modular outdoor kitchens where the oven, prep space and cooking appliances are planned as one cohesive build rather than a collection of separate purchases. That coordination is exactly what reduces integration risk: getting flue clearance, façade material and utility routing agreed before construction starts, rather than discovered halfway through.
Every Roostr kitchen starts with 3D design guidance, so you see how the oven, counters and storage sit together before a single panel is cut. The stainless and galvanised steel construction is built to handle UK weather year round, and a single supplier managing design and installation means finish, clearance and service access get resolved once, by people who have already solved these problems on real projects. If you are weighing up a self-managed build against a coordinated one, a specialist landscaping partner like Trew Landscape is worth a look too, though for a fully integrated modular kitchen, request a design consultation with Roostr to see how your own space could work.
Sources
- Do you need planning permission for an outdoor pizza oven? — Planning House
- What bricks should I use to build a pizza oven — Brickhunter
- Planning permission for outdoor kitchens — Planning Portal
- What can you cook in a pizza oven? — BBC Good Food
Recommended
- An outdoor kitchen for every season - this outdoor kitchen makes it po – Roostr Buitenkeukens
- Creating the perfect outdoor kitchen: tips and inspiration – Roostr Buitenkeukens
- Outdoor kitchen in a unique corner arrangement – Roostr Buitenkeukens
- Beautiful outdoor kitchen under canopy – Roostr Buitenkeukens
BBQ canopy for your outdoor kitchen: Heeren van Eijck x Roostr
Grid Access Decides Natural Gas or Propane for 1.7 Million UK Homes